Going Back in Time – How to Remove the EDC System
By the end of 1996, Land Rover decided to improve the performance of the Automatic Tdi300 Discovery. They have done that by changing the mechanical diesel pump to and electronic one. Doing so, they needed to add some “gizmos” to the old engine: a crank shaft sensor, airflow sensor, TPS, ECM and the famous “electronic” injector AKA injector #4.
The truth must be said, it worked pretty good, added few horse power so the Disco became a little more responsive. But, as you can understand, wiring and electronics were involved and sometimes, they fail.
One of the most problematic failure is the electronic injector, injector #4 (the one which is closer to the firewall). It is hard to get a new one as Bosch doesn’t sell them anymore.
The symptoms on my 1998 Discovery were:
- Check Engine light was on
- Engine “cut” couldn’t idle.
- Hard start, usually, cold starts took forever…
So, since I couldn’t find a new injector and in order to simply the system, I decided to cancel the EDC and get back to the basics, mechanical diesel pump as it was in the pre 97 models.
Required Parts:
- Mechanical diesel pump
- 4 ERR3339 injectors (although they look like the ones you currently have, they are not the same)
- New Fuel Lines (the lines of the EDC are different)
- Accelerator pedal cable (the EDC is “fly by wire”, no cable, I used the cruse control cable as it was disabled on my Disco)
- Timing Belt Kit – if needed (you will have to open the timing cover and reinstall the belt, so it would be a good idea to install a new one)
Required Tools:
- Sockets: 22,26,10,13, 15 mm
- Ring/Spanner wrenches: 8, 10, 17, 11 & a thin 32mm (for the fan clutch)
- Torque Wrench ( 1/2 ” drive)
- Crank shaft pulley puller
Let’s start Working…
Remove the old diesel pump:
- Remove the fan clutch: locate the 32mm spanner wrench on the fan clutch nut, hit it lightly, clockwise, with a hammer and then turn it by hand till it get of the screw. be careful not of harm the radiator.
- Carefully, remove the radiator shroud.
- Remove the A/C compressor (if any), do not remove its pipes, just move it aside so it won’t interfere your work.
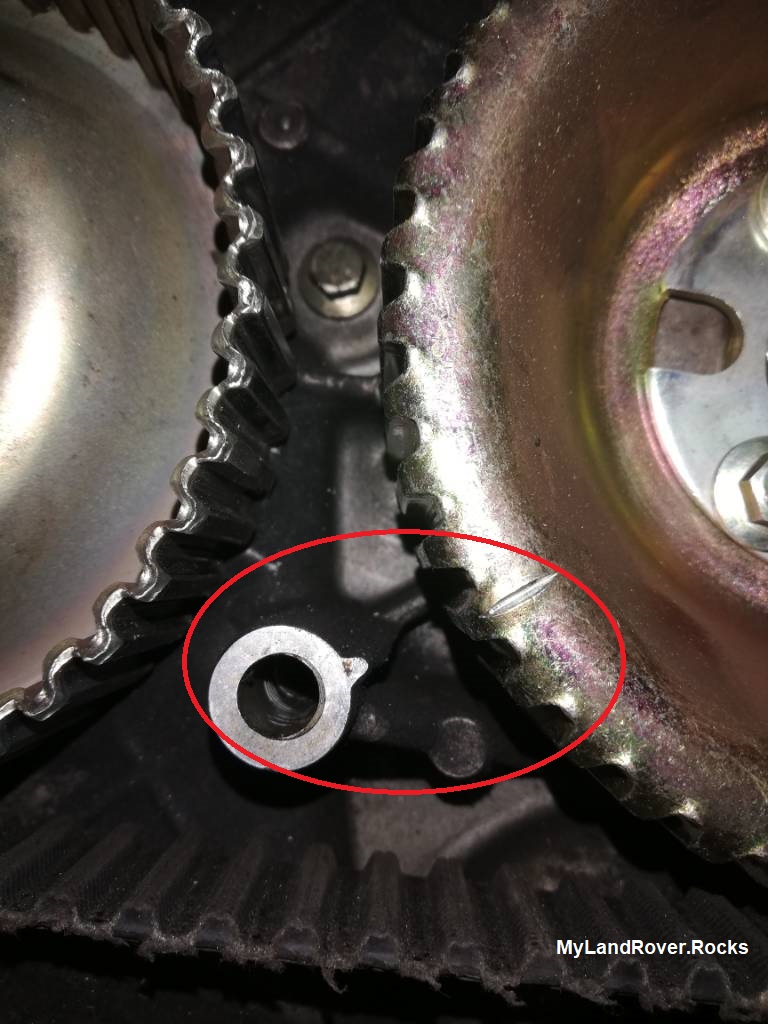
- Remove the Crank Shaft Pulley: using a 26mm socket and a long wrench remove the nut that holds the pulley in place. You may need to use an impact driver, in such case, you may have to remove the radiator… Take the pulley out using the pulley puller, pay attention: there is a small spline which avoids the pulley from turning without the shaft, do not lose it.
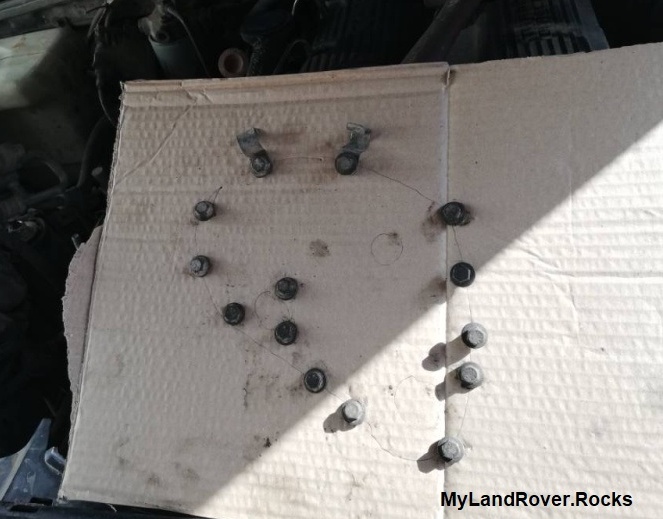
- Remove the “timing cover”: use 10mm socket and wrench to remove the bolts that hold the timing cover in place. The bolts length are different so you may want to remember their order.
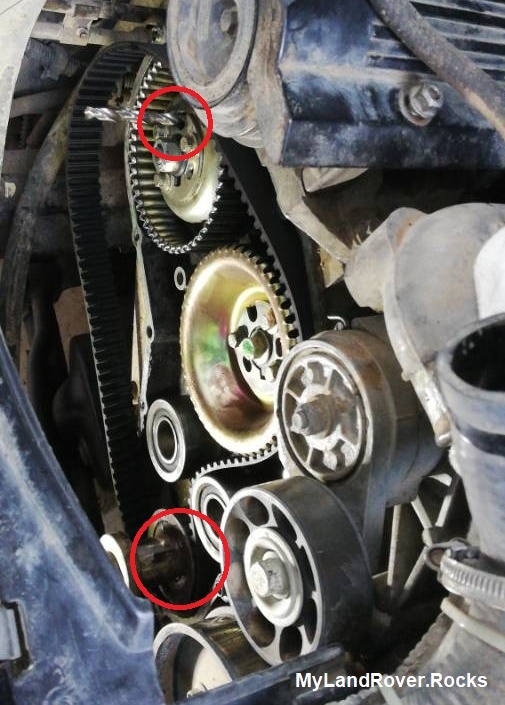
- Set the timing belt to the correct setup (turn the crank shaft, make sure the ignition is off) look at the pictures below:
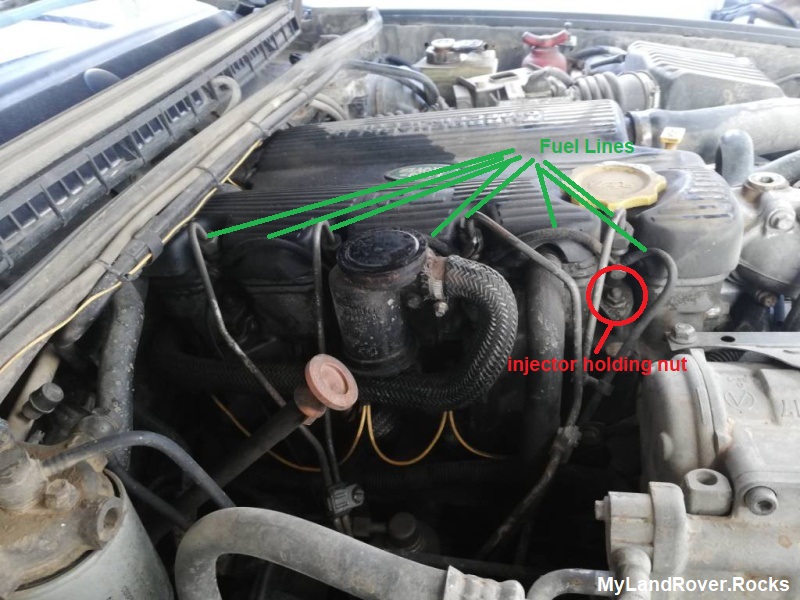
- Disconnect the pipes from the back of the pump, pay attention which pipes goes to which injector. the upper ones to to injectors 2,4.
- Disconnect the electric connector
- Disconnect the kick down cable.
- Remove the 2 bolts that holds the back of the pump
- Remove the 3 nuts from the front of the pump (can be seen in the picture above)
- Carefully, pull the pump out and install the new one in place.
- Kick Down cable connects the same as before.
- Accelerator cable connects to the second hole.
- The white “+” wire from the loom can be connected to the cut off solenoid of the pump (later, switch the cable with a “switch” positive cable that doesn’t work through the ECU)
Install the new injectors:
- Remove the fuel lines from the injectors
- Remove the nut that holds the injector in place, pull the plate which holds it and “play” with the injector, turn it a little to the right/left till you’ll be able to pull it out. be careful not to drop anything into the cylinder head. Install the new injectors with new washers and new fuel lines.
Install the timing belt (refer to the article – coming soon…)
Install everything back in place.
At this point, the engine will work and the Check Engine light will stay on. if you want to cancel it, do as follows:
- Connect a “switched +” wire to the diesel pump solenoid.
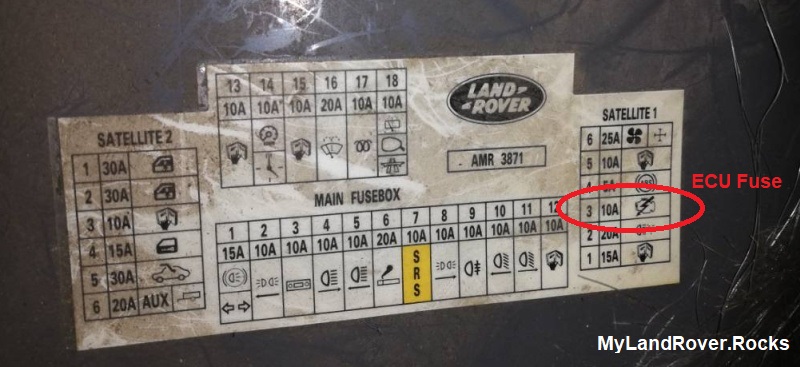
- Disconnect the ECU plug, The ECU can be found on the inner side, next to the passenger door. One more way to go is to cut the “+” wire that leads to the ECU from the fuse box and connect that “+” to the diesel pump (that is what I did).
That is it. Welcome to the past, where no ECU’s were on 🙂
Update:
It took me a while, but I notice that the A/C compressor always work (even when the A/C supposed to be off), the reason is that it is being controlled by the ECU.
The solution is to cut the yellow/black wire that connects to terminal #44 in the ECU and connect it to terminal #86 in the A/C compressor relay (instead of the current wire which comes from the ECU).
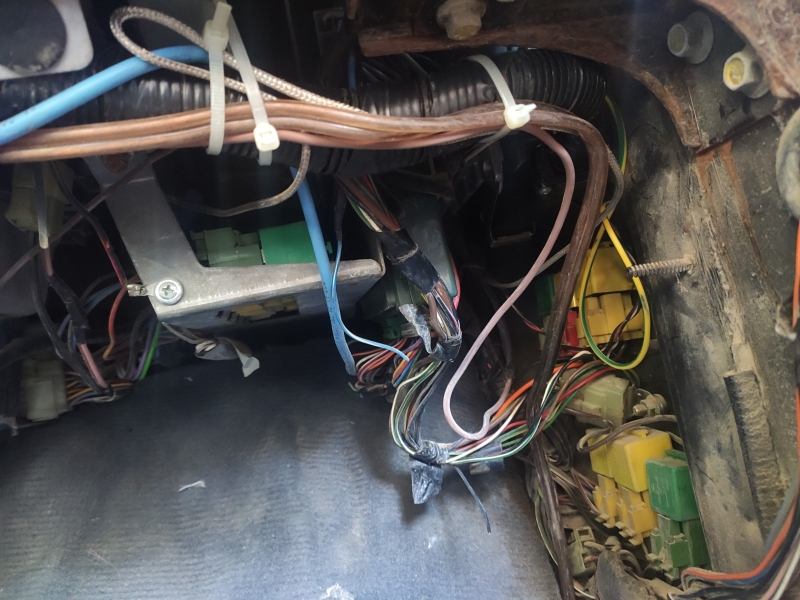
That’s the wiring harness and the location of the A/C relay (on the right panel, under the gloves box, right to the passenger legs)
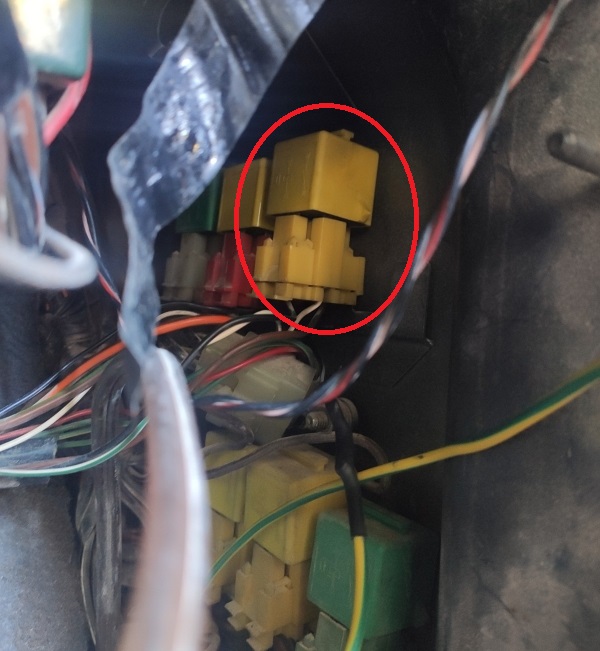
The A/C compressor relay:
The wires that should be cut and connect:
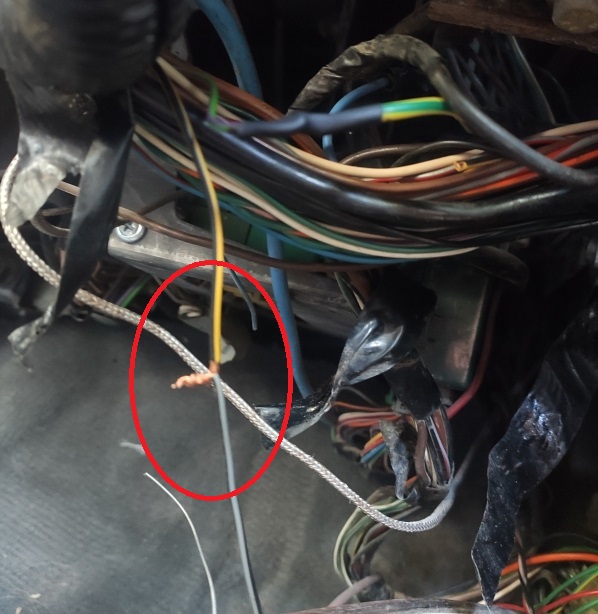
In the pictures the wires are not soldered and isolated, do not forget to solder them and isolate…


